.animate()
Содержание:
- CSS Properties
- CSS Advanced
- Свойства CSS3-анимации
- CSS Animation Properties
- Правило @keyframes
- Animate.css
- Этапы создания анимации
- The @keyframes Rule
- CSS Reference
- CSS Properties
- Property Values
- CSS Properties
- Specify the Speed Curve of the Animation
- References
- GreenSock (GSAP)
- Introduction
- CSS Reference
- CSS Properties
- The 6 steps of animation
CSS Properties
align-contentalign-itemsalign-selfallanimationanimation-delayanimation-directionanimation-durationanimation-fill-modeanimation-iteration-countanimation-nameanimation-play-stateanimation-timing-functionbackface-visibilitybackgroundbackground-attachmentbackground-blend-modebackground-clipbackground-colorbackground-imagebackground-originbackground-positionbackground-repeatbackground-sizeborderborder-bottomborder-bottom-colorborder-bottom-left-radiusborder-bottom-right-radiusborder-bottom-styleborder-bottom-widthborder-collapseborder-colorborder-imageborder-image-outsetborder-image-repeatborder-image-sliceborder-image-sourceborder-image-widthborder-leftborder-left-colorborder-left-styleborder-left-widthborder-radiusborder-rightborder-right-colorborder-right-styleborder-right-widthborder-spacingborder-styleborder-topborder-top-colorborder-top-left-radiusborder-top-right-radiusborder-top-styleborder-top-widthborder-widthbottombox-decoration-breakbox-shadowbox-sizingbreak-afterbreak-beforebreak-insidecaption-sidecaret-color@charsetclearclipclip-pathcolorcolumn-countcolumn-fillcolumn-gapcolumn-rulecolumn-rule-colorcolumn-rule-stylecolumn-rule-widthcolumn-spancolumn-widthcolumnscontentcounter-incrementcounter-resetcursordirectiondisplayempty-cellsfilterflexflex-basisflex-directionflex-flowflex-growflex-shrinkflex-wrapfloatfont@font-facefont-familyfont-feature-settingsfont-kerningfont-sizefont-size-adjustfont-stretchfont-stylefont-variantfont-variant-capsfont-weightgapgridgrid-areagrid-auto-columnsgrid-auto-flowgrid-auto-rowsgrid-columngrid-column-endgrid-column-gapgrid-column-startgrid-gapgrid-rowgrid-row-endgrid-row-gapgrid-row-startgrid-templategrid-template-areasgrid-template-columnsgrid-template-rowshanging-punctuationheighthyphensimage-rendering@importisolationjustify-content@keyframesleftletter-spacingline-heightlist-stylelist-style-imagelist-style-positionlist-style-typemarginmargin-bottommargin-leftmargin-rightmargin-topmask-imagemask-originmask-positionmask-repeatmask-sizemax-heightmax-width@mediamin-heightmin-widthmix-blend-modeobject-fitobject-positionopacityorderorphansoutlineoutline-coloroutline-offsetoutline-styleoutline-widthoverflowoverflow-wrapoverflow-xoverflow-ypaddingpadding-bottompadding-leftpadding-rightpadding-toppage-break-afterpage-break-beforepage-break-insideperspectiveperspective-originpointer-eventspositionquotesresizerightrow-gapscroll-behaviortab-sizetable-layouttext-aligntext-align-lasttext-decorationtext-decoration-colortext-decoration-linetext-decoration-styletext-indenttext-justifytext-overflowtext-shadowtext-transformtoptransformtransform-origintransform-styletransitiontransition-delaytransition-durationtransition-propertytransition-timing-functionunicode-bidiuser-selectvertical-alignvisibilitywhite-spacewidowswidthword-breakword-spacingword-wrapwriting-modez-index
CSS Advanced
CSS Rounded CornersCSS Border ImagesCSS BackgroundsCSS ColorsCSS Color KeywordsCSS Gradients
Linear Gradients
Radial Gradients
Conic Gradients
CSS Shadows
Shadow Effects
Box Shadow
CSS Text EffectsCSS Web FontsCSS 2D TransformsCSS 3D TransformsCSS TransitionsCSS AnimationsCSS TooltipsCSS Style ImagesCSS Image ReflectionCSS object-fitCSS object-positionCSS ButtonsCSS PaginationCSS Multiple ColumnsCSS User InterfaceCSS Variables
The var() Function
Overriding Variables
Variables and JavaScript
Variables in Media Queries
CSS Box SizingCSS Media QueriesCSS MQ ExamplesCSS Flexbox
CSS Flexbox
CSS Flex Container
CSS Flex Items
CSS Flex Responsive
Свойства CSS3-анимации
Давайте познакомимся с основным перечнем свойств CSS3-анимации:
- задержка;
- запуск и остановка;
- повторное воспроизведение;
- состояние до начала анимации и после ее окончания;
- направление движения.
Помимо основных свойств анимации можно задействовать дополнительные, которые нужны для построения усложненных эффектов.
Задержка анимации: свойство animation-delay
Задержка анимации или обозначает, сколько времени пройдет до начала воспроизведения. Свойство прописывается в секундах или миллисекундах:
element {
  animation-name: animation-1;
  animation-duration: 2s;
  animation-delay: 3s; // перед запуском анимации пройдет 3 секунды
}
Повторное воспроизведение анимации: свойство animation-iteration-count
Повторное воспроизведение анимации записывается как . Его можно указывать в виде количества повторов анимации, например, 0 или 3 раза.
Также можно зациклить анимацию, сделав ее постоянно воспроизводящейся, для этого в свойстве прописывается .
Фрагмент кода с использованием задержки и повторного воспроизведения будет выглядеть следующим образом:
element {
  animation-name: example;
  animation-duration: 3s;
  animation-delay: 2s;
  animation-iteration-count: infinite; // анимация будет зацикленной
}
Состояние элемента до и после: свойство animation-fill-mode
Следующий параметр CSS3-анимации — состояние элемента до и после. Оно называется . Для него после двоеточия можно прописать следующие значения:
- — означает, что после завершения анимации элемент окажется в состоянии последнего кейфрейма;
- — стандартное значение, при котором состояние элемента не изменяется;
- — определяет, что перед началом анимации элемент будет в состоянии первого кейфрейма, а после завершения перейдет в последний;
- — когда анимация завершится, элемент вернется в состояние первого кейфрейма.
Для одной и той же анимации можно использовать разные состояния до и после, получая новые варианты движения.
Синтаксис будет выглядеть следующим образом:
animation-fill-mode: none;
animation-fill-mode: forwards;
animation-fill-mode: backwards;
animation-fill-mode: both;
animation-fill-mode: none, backwards;
animation-fill-mode: both, forwards, none;
Запуск и остановка анимации: animation-play-state
Свойство запуска и остановки анимации прописывается как . Оно принимает лишь два основных варианта значений: или . А также — устанавливает значение свойства в значение по умолчанию, и — наследует значение от родительского элемента.
Синтаксис:
animation-play-state: running;
animation-play-state: paused;
animation-play-state: paused, running, running;
animation-play-state: initial;
animation-play-state: inherit;
Направление анимации: свойство animation-direction
Направление анимации или определяет направление воспроизведения. Для него существует несколько возможных значений, среди которых:
- — последовательный порядок;
- — четные повторы в нормальном порядке, а нечетные — в обратном;
- — обратный порядок;
- — нечетные повторы в прямом, а четные — в обратном порядке;
- — устанавливает значение свойства в значение по умолчанию;
- — наследует значение от родительского элемента.
Использование разных значений для одних и тех же кадров позволит получить несколько вариантов анимации, которые будут различаться между собой.
Синтаксис:
animation-direction: normal;
animation-direction: reverse;
animation-direction: alternate;
animation-direction: alternate-reverse;
animation-direction: normal, reverse;
animation-direction: alternate, reverse, normal;
animation-direction: initial;
animation-direction: inherit;
CSS Animation Properties
The following table lists the @keyframes rule and all the CSS animation properties:
| Property | Description |
|---|---|
| @keyframes | Specifies the animation code |
| animation | A shorthand property for setting all the animation properties |
| animation-delay | Specifies a delay for the start of an animation |
| animation-direction | Specifies whether an animation should be played forwards, backwards or in alternate cycles |
| animation-duration | Specifies how long time an animation should take to complete one cycle |
| animation-fill-mode | Specifies a style for the element when the animation is not playing (before it starts, after it ends, or both) |
| animation-iteration-count | Specifies the number of times an animation should be played |
| animation-name | Specifies the name of the @keyframes animation |
| animation-play-state | Specifies whether the animation is running or paused |
| animation-timing-function | Specifies the speed curve of the animation |
❮ Previous
Next ❯
Правило @keyframes
Правило @keyframes позволяет создавать анимацию с помощью ключевых кадров — состояний объекта в определенный момент времени.
Ключевые кадры анимации создаются с помощью ключевых слов from и to (эквивалентны значениям 0% и 100%) или с помощью процентных пунктов, которых можно задавать сколько угодно. Также можно комбинировать ключевые слова и процентные пункты.
Если не задан начальный (from, 0%) или конечный (to, 100%) кадр, браузер установит для них расчётные значения анимируемых свойств такими, какими они были бы если бы не была применена анимация.
Если у двух ключевых кадров будут одинаковые селекторы, то последующий отменит действие предыдущего.
При определении анимации сразу после свойства @keyframes должно следовать имя данной анимации (данное имя затем должно быть указано в свойстве animation элемента, который будет анимирован).
Пример:
@keyframes move {
  from {
    transform: translateX(0px);
  }
  50% {
    transform: translateX(130px);
  }
  100% {
    transform: translateX(0px);
  }
}
Мы создали анимацию, которая работает следующим образом:
- Начало анимации (from можно было написать 0%) — положение элемента по оси Х равно 0px;
- Середина анимации (50%) — положение элемента по оси Х равно 130px;
- Конец анимации (to мы использовали 100%) — возвращаем элемент на начало анимации, т.е. положение элемента по оси Х равно 0px;
See the Pen <a href=’http://codepen.io/AmateR/pen/ONgOQY/’>ONgOQY</a> by Aleksei (<a href=’http://codepen.io/AmateR’>@AmateR</a>) on <a href=’http://codepen.io’>CodePen</a>.
Ключевые кадры можно группировать:
@keyframes move {
  from {
    transform: translateX(0px);
  }
  25%, 50% {
    transform: translateX(130px);
  }
  100% {
    transform: translateX(0px);
  }
}
Одному элементу можно назначить несколько анимаций, их имена и параметры надо писать в порядке присвоения:
element {
    animation-name: animation-1, animation-2;
    animation-duration: 2s, 4s;
}
Подключение анимации к элементу происходит двумя командами — animation-name и animation-duration.
Animate.css
Animate.css is one of the smallest and most easy-to-use CSS animation libraries available. Applying the Animate library to your project is as simple as linking the CSS and adding the required CSS classes to your HTML elements. You can also use jQuery to trigger the animations on a particular event if you prefer.
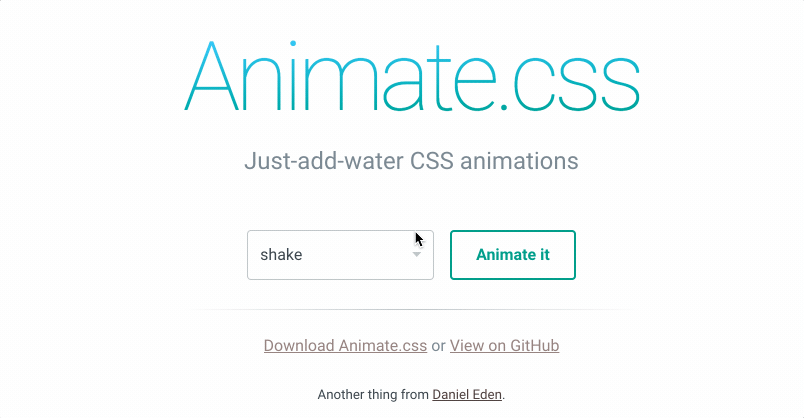
- Creators: Daniel Eden
- Released: 2013
- Current Version: 3.7.2
- Popularity: 62,284 stars on GitHub
- Description: “A cross-browser library of CSS animations. As easy to use as an easy thing.”
- Library Size: 56.7 kB (minified)
- GitHub: https://github.com/daneden/animate.css
- License:
At the time of writing, it’s still one of the most popular and widely-used CSS animation libraries and its minified file is small enough for inclusion in mobile websites as well.
Animate.css is still under active development. Watch out for version 4, which will support CSS custom properties (aka CSS variables). This is one of the simplest and most robust animation libraries and we wouldn’t hesitate to use this in any project.
Этапы создания анимации
Давайте рассмотрим из чего же состоит процесс создания анимации в CSS. Для начала Вам необходимо определить ключевые кадры анимации. Что из себя представляет ключевой кадр? Представьте себе элемент, который позиционируется слева от окна браузера и Вам необходимо осуществить его анимацию до середины окна и вернуть его в первоначальное положение. Для этой анимации нам потребуется три ключевых кадра:
- Первый – определяет начальное положение элемента.
- Второй – определяет положение элемента после смещения элемента до середины окна.
- Третий – определяет конечную точку анимации (начальное положение элемента).
После того как необходимые ключевые кадры определены, на браузер пользователя будет возлагаться задача прорисовывать все промежуточные фазы, которые мы определили с помощью ключевых кадров. То есть, задача прорисовывать элемент в этих промежутках лежит исключительно на браузере, с нашей стороны необходимо только указать эти точки анимации, или другими словами, мы должны сообщить браузеру как он должен изменить один стиль к другому между ключевыми кадрами.
Следующим шагом нам необходимо назначить анимацию интересующему нас элементу, или элементам. При этом существует возможность указать для каждого элемента свою индивидуальную настройку анимации.
Далее в этой статье мы с Вами подробно рассмотрим, как установить задержку анимации, как задать количество циклов анимации, установить её продолжительность, указать её скорость и направление, состояние анимации на текущий момент и даже определить стиль для элемента в тот момент, когда анимация не воспроизводится.
Прежде чем мы перейдем к созданию анимации, хочу обратить Ваше внимание на текущую поддержку свойств анимации браузерами:
| Chrome | Firefox | Opera | Safari | IExplorer | Edge |
|---|---|---|---|---|---|
| 43.04.0 -webkit- | 16.05.0 -moz- | 30.015.0 -webkit- | 9.04.0 -webkit- | 10.0 | 12.0 |
The @keyframes Rule
When you specify CSS styles inside the
rule, the animation will gradually change from the current style to the new style
at certain times.
To get an animation to work, you must bind the animation to an element.
The following example binds the «example» animation to the <div> element.
The animation will last for 4 seconds, and it will gradually change the
background-color of the <div> element from «red» to «yellow»:
Example
/* The animation code */
@keyframes example {
from {background-color: red;}
to {background-color: yellow;}
}/* The element to apply the animation to */
div { width: 100px; height: 100px;
background-color: red;
animation-name: example; animation-duration: 4s;
}
Note: The property
defines how long an animation should take to complete. If the property is not specified,
no animation will occur, because
the default value is 0s (0 seconds).
In the example above we have specified when the style will change by using
the keywords «from» and «to» (which represents 0% (start) and 100% (complete)).
It is also possible to use percent. By using percent, you can add as many
style changes as you like.
The following example will change the background-color of the <div>
element when the animation is 25% complete, 50% complete, and again when the animation is 100% complete:
Example
/* The animation code */@keyframes example
{
0% {background-color: red;}
25% {background-color: yellow;}
50% {background-color: blue;}
100% {background-color: green;}
}/* The element to apply the animation to */div {
width: 100px; height: 100px; background-color: red; animation-name: example; animation-duration: 4s;}
The following example will change both the background-color and the position of the <div>
element when the animation is 25% complete, 50% complete, and again when the animation is 100% complete:
Example
/* The animation code */@keyframes example
{
0% {background-color:red; left:0px; top:0px;}
25% {background-color:yellow; left:200px; top:0px;}
50% {background-color:blue; left:200px; top:200px;}
75% {background-color:green; left:0px; top:200px;}
100% {background-color:red; left:0px; top:0px;}
}/* The element to apply the animation to */div {
width: 100px; height: 100px;
position: relative; background-color: red; animation-name: example; animation-duration: 4s;}
CSS Reference
CSS ReferenceCSS Browser SupportCSS SelectorsCSS FunctionsCSS Reference AuralCSS Web Safe FontsCSS Fallback FontsCSS AnimatableCSS UnitsCSS PX-EM ConverterCSS ColorsCSS Color ValuesCSS Default ValuesCSS Entities
CSS Properties
align-content
align-items
align-self
all
animation
animation-delay
animation-direction
animation-duration
animation-fill-mode
animation-iteration-count
animation-name
animation-play-state
animation-timing-function
backface-visibility
background
background-attachment
background-blend-mode
background-clip
background-color
background-image
background-origin
background-position
background-repeat
background-size
border
border-bottom
border-bottom-color
border-bottom-left-radius
border-bottom-right-radius
border-bottom-style
border-bottom-width
border-collapse
border-color
border-image
border-image-outset
border-image-repeat
border-image-slice
border-image-source
border-image-width
border-left
border-left-color
border-left-style
border-left-width
border-radius
border-right
border-right-color
border-right-style
border-right-width
border-spacing
border-style
border-top
border-top-color
border-top-left-radius
border-top-right-radius
border-top-style
border-top-width
border-width
bottom
box-decoration-break
box-shadow
box-sizing
break-after
break-before
break-inside
caption-side
caret-color
@charset
clear
clip
clip-path
color
column-count
column-fill
column-gap
column-rule
column-rule-color
column-rule-style
column-rule-width
column-span
column-width
columns
content
counter-increment
counter-reset
cursor
direction
display
empty-cells
filter
flex
flex-basis
flex-direction
flex-flow
flex-grow
flex-shrink
flex-wrap
float
font
@font-face
font-family
font-feature-settings
font-kerning
font-size
font-size-adjust
font-stretch
font-style
font-variant
font-variant-caps
font-weight
gap
grid
grid-area
grid-auto-columns
grid-auto-flow
grid-auto-rows
grid-column
grid-column-end
grid-column-gap
grid-column-start
grid-gap
grid-row
grid-row-end
grid-row-gap
grid-row-start
grid-template
grid-template-areas
grid-template-columns
grid-template-rows
hanging-punctuation
height
hyphens
image-rendering
@import
isolation
justify-content
@keyframes
left
letter-spacing
line-height
list-style
list-style-image
list-style-position
list-style-type
margin
margin-bottom
margin-left
margin-right
margin-top
mask-image
mask-origin
mask-position
mask-repeat
mask-size
max-height
max-width
@media
min-height
min-width
mix-blend-mode
object-fit
object-position
opacity
order
orphans
outline
outline-color
outline-offset
outline-style
outline-width
overflow
overflow-wrap
overflow-x
overflow-y
padding
padding-bottom
padding-left
padding-right
padding-top
page-break-after
page-break-before
page-break-inside
perspective
perspective-origin
pointer-events
position
quotes
resize
right
row-gap
scroll-behavior
tab-size
table-layout
text-align
text-align-last
text-decoration
text-decoration-color
text-decoration-line
text-decoration-style
text-indent
text-justify
text-overflow
text-shadow
text-transform
top
transform
transform-origin
transform-style
transition
transition-delay
transition-duration
transition-property
transition-timing-function
unicode-bidi
user-select
vertical-align
visibility
white-space
widows
width
word-break
word-spacing
word-wrap
writing-mode
z-index
Property Values
| Value | Description | Play it |
|---|---|---|
| linear | The animation has the same speed from start to end | Play it » |
| ease | Default value. The animation has a slow start, then fast, before it ends slowly | Play it » |
| ease-in | The animation has a slow start | Play it » |
| ease-out | The animation has a slow end | Play it » |
| ease-in-out | The animation has both a slow start and a slow end | Play it » |
| step-start | Equivalent to steps(1, start) | |
| step-end | Equivalent to steps(1, end) | |
| steps(int,start|end) | Specifies a stepping function, with two parameters. The first parameter specifies the number of intervals in the function. It must be a positive integer (greater than 0). The second parameter, which is optional, is either the value «start» or «end», and specifies the point at which the change of values occur within the interval. If the second parameter is omitted, it is given the value «end» | |
| cubic-bezier(n,n,n,n) | Define your own values in the cubic-bezier function Possible values are numeric values from 0 to 1 |
|
| initial | Sets this property to its default value. Read about initial | |
| inherit | Inherits this property from its parent element. Read about inherit |
Tip: Try the different values in the «More Examples» section below.
CSS Properties
align-contentalign-itemsalign-selfallanimationanimation-delayanimation-directionanimation-durationanimation-fill-modeanimation-iteration-countanimation-nameanimation-play-stateanimation-timing-functionbackface-visibilitybackgroundbackground-attachmentbackground-blend-modebackground-clipbackground-colorbackground-imagebackground-originbackground-positionbackground-repeatbackground-sizeborderborder-bottomborder-bottom-colorborder-bottom-left-radiusborder-bottom-right-radiusborder-bottom-styleborder-bottom-widthborder-collapseborder-colorborder-imageborder-image-outsetborder-image-repeatborder-image-sliceborder-image-sourceborder-image-widthborder-leftborder-left-colorborder-left-styleborder-left-widthborder-radiusborder-rightborder-right-colorborder-right-styleborder-right-widthborder-spacingborder-styleborder-topborder-top-colorborder-top-left-radiusborder-top-right-radiusborder-top-styleborder-top-widthborder-widthbottombox-decoration-breakbox-shadowbox-sizingbreak-afterbreak-beforebreak-insidecaption-sidecaret-color@charsetclearclipclip-pathcolorcolumn-countcolumn-fillcolumn-gapcolumn-rulecolumn-rule-colorcolumn-rule-stylecolumn-rule-widthcolumn-spancolumn-widthcolumnscontentcounter-incrementcounter-resetcursordirectiondisplayempty-cellsfilterflexflex-basisflex-directionflex-flowflex-growflex-shrinkflex-wrapfloatfont@font-facefont-familyfont-feature-settingsfont-kerningfont-sizefont-size-adjustfont-stretchfont-stylefont-variantfont-variant-capsfont-weightgapgridgrid-areagrid-auto-columnsgrid-auto-flowgrid-auto-rowsgrid-columngrid-column-endgrid-column-gapgrid-column-startgrid-gapgrid-rowgrid-row-endgrid-row-gapgrid-row-startgrid-templategrid-template-areasgrid-template-columnsgrid-template-rowshanging-punctuationheighthyphensimage-rendering@importisolationjustify-content@keyframesleftletter-spacingline-heightlist-stylelist-style-imagelist-style-positionlist-style-typemarginmargin-bottommargin-leftmargin-rightmargin-topmask-imagemask-originmask-positionmask-repeatmask-sizemax-heightmax-width@mediamin-heightmin-widthmix-blend-modeobject-fitobject-positionopacityorderorphansoutlineoutline-coloroutline-offsetoutline-styleoutline-widthoverflowoverflow-wrapoverflow-xoverflow-ypaddingpadding-bottompadding-leftpadding-rightpadding-toppage-break-afterpage-break-beforepage-break-insideperspectiveperspective-originpointer-eventspositionquotesresizerightrow-gapscroll-behaviortab-sizetable-layouttext-aligntext-align-lasttext-decorationtext-decoration-colortext-decoration-linetext-decoration-styletext-indenttext-justifytext-overflowtext-shadowtext-transformtoptransformtransform-origintransform-styletransitiontransition-delaytransition-durationtransition-propertytransition-timing-functionunicode-bidiuser-selectvertical-alignvisibilitywhite-spacewidowswidthword-breakword-spacingword-wrapwriting-modez-index
Specify the Speed Curve of the Animation
The property specifies the speed curve of the
animation.
The animation-timing-function property can have the following values:
- — Specifies an animation with a slow start, then fast, then end slowly (this is default)
- — Specifies an animation with the same speed from start to end
- — Specifies an animation with a slow start
- — Specifies an animation with a slow end
- — Specifies an animation with a slow start and end
- — Lets you define your own values in a cubic-bezier function
The following example shows some of the different speed curves that can be used:
Example
#div1 {animation-timing-function: linear;}#div2
{animation-timing-function: ease;}#div3 {animation-timing-function:
ease-in;}#div4 {animation-timing-function: ease-out;}#div5
{animation-timing-function: ease-in-out;}
References
Normative references
- Bert Bos; et al. Cascading Style
Sheets Level 2 Revision 1 (CSS 2.1) Specification. 7 June
2011. W3C Recommendation. URL: http://www.w3.org/TR/2011/REC-CSS2-20110607/ - Dean Jackson; et al. CSS
Transitions. 3 April 2012. W3C Working Draft. (Work in
progress.) URL: http://www.w3.org/TR/2012/WD-css3-transitions-20120403/
Other references
- Håkon Wium Lie; Tab Atkins; Elika J. Etemad. CSS
Values and Units Module Level 3. 28 August 2012. W3C Candidate
Recommendation. (Work in progress.) URL: http://www.w3.org/TR/2012/CR-css3-values-20120828/ - Ben Caldwell; et al. Web Content
Accessibility Guidelines (WCAG) 2.0. 11 December 2008. W3C
Recommendation. URL: http://www.w3.org/TR/2008/REC-WCAG20-20081211/
GreenSock (GSAP)
GreenSock (or GSAP – GreenSock Animation Platform) is the Swiss army knife of web animation. For sleek and sophisticated animations that run smoothly, GSAP is ideal. You can animate anything, from DOM elements to SVGs, and its ecosystem includes some amazing plugins that let you do all sorts of fun stuff, e.g., morphing SVGs, drawing SVG strokes, scrolling functionality, scrambling text, and much more. It’s fast, cross-browser compatible, and its syntax is straightforward and intuitive.
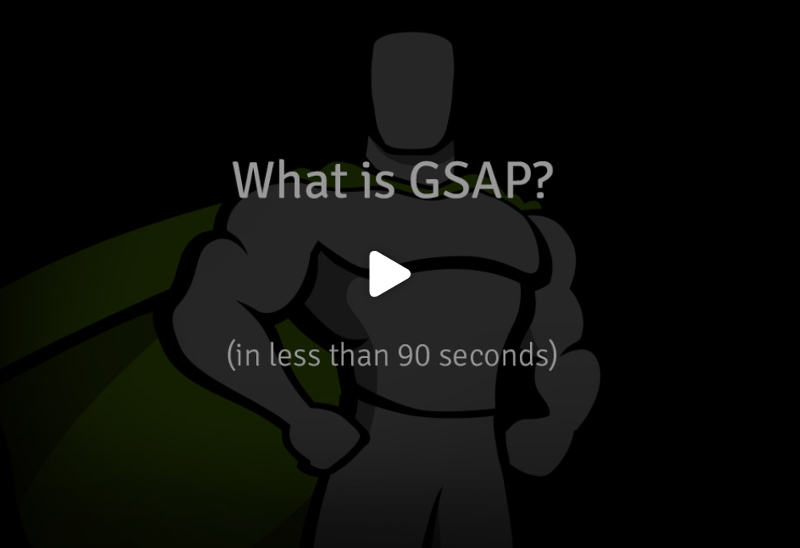
- Current Version: 2.1.3
- Popularity on GitHub: 9,709 stars on GitHub
- Description: “Ultra high-performance, professional-grade animation for the modern web.”
- Library Size: 313 kB (minified folder containing the lightweight download of the library)
- GitHub: https://github.com/greensock/GreenSock-JS/
- License: standard no charge license, mixed with a paid model for specific features and plugins. See the licensing page for more details.
GSAP is modular, therefore you can pick and choose which parts of the library you need for your project, which is great for keeping the file size under control.
If you’re looking for something powerful but intuitive with awesome documentation and community support, I would definitely recommend you give this animation library a shot in your next project. You’ll be enthusiastic.
Introduction
This section is not normative.
CSS Transitions provide
a way to interpolate CSS property values when they change as a result of
underlying property changes. This provides an easy way to do simple
animation, but the start and end states of the animation are controlled by
the existing property values, and transitions provide little control to
the author on how the animation progresses.
This proposal introduces defined
animations, in which the author can specify the changes in CSS
properties over time as a set of keyframes. Animations are similar to
transitions in that they change the presentational value of CSS properties
over time. The principal difference is that while transitions trigger
implicitly when property values change, animations are
explicitly executed when the animation properties are applied.
Because of this, animations require explicit values for the properties
being animated. These values are specified using animation keyframes,
described below.
Many aspects of the animation can be controlled, including how many
times the animation iterates, whether or not it alternates between the
begin and end values, and whether or not the animation should be running
or paused. An animation can also delay its start time.
CSS Reference
CSS ReferenceCSS Browser SupportCSS SelectorsCSS FunctionsCSS Reference AuralCSS Web Safe FontsCSS Fallback FontsCSS AnimatableCSS UnitsCSS PX-EM ConverterCSS ColorsCSS Color ValuesCSS Default ValuesCSS Entities
CSS Properties
align-content
align-items
align-self
all
animation
animation-delay
animation-direction
animation-duration
animation-fill-mode
animation-iteration-count
animation-name
animation-play-state
animation-timing-function
backface-visibility
background
background-attachment
background-blend-mode
background-clip
background-color
background-image
background-origin
background-position
background-repeat
background-size
border
border-bottom
border-bottom-color
border-bottom-left-radius
border-bottom-right-radius
border-bottom-style
border-bottom-width
border-collapse
border-color
border-image
border-image-outset
border-image-repeat
border-image-slice
border-image-source
border-image-width
border-left
border-left-color
border-left-style
border-left-width
border-radius
border-right
border-right-color
border-right-style
border-right-width
border-spacing
border-style
border-top
border-top-color
border-top-left-radius
border-top-right-radius
border-top-style
border-top-width
border-width
bottom
box-decoration-break
box-shadow
box-sizing
break-after
break-before
break-inside
caption-side
caret-color
@charset
clear
clip
clip-path
color
column-count
column-fill
column-gap
column-rule
column-rule-color
column-rule-style
column-rule-width
column-span
column-width
columns
content
counter-increment
counter-reset
cursor
direction
display
empty-cells
filter
flex
flex-basis
flex-direction
flex-flow
flex-grow
flex-shrink
flex-wrap
float
font
@font-face
font-family
font-feature-settings
font-kerning
font-size
font-size-adjust
font-stretch
font-style
font-variant
font-variant-caps
font-weight
gap
grid
grid-area
grid-auto-columns
grid-auto-flow
grid-auto-rows
grid-column
grid-column-end
grid-column-gap
grid-column-start
grid-gap
grid-row
grid-row-end
grid-row-gap
grid-row-start
grid-template
grid-template-areas
grid-template-columns
grid-template-rows
hanging-punctuation
height
hyphens
image-rendering
@import
isolation
justify-content
@keyframes
left
letter-spacing
line-height
list-style
list-style-image
list-style-position
list-style-type
margin
margin-bottom
margin-left
margin-right
margin-top
mask-image
mask-origin
mask-position
mask-repeat
mask-size
max-height
max-width
@media
min-height
min-width
mix-blend-mode
object-fit
object-position
opacity
order
orphans
outline
outline-color
outline-offset
outline-style
outline-width
overflow
overflow-wrap
overflow-x
overflow-y
padding
padding-bottom
padding-left
padding-right
padding-top
page-break-after
page-break-before
page-break-inside
perspective
perspective-origin
pointer-events
position
quotes
resize
right
row-gap
scroll-behavior
tab-size
table-layout
text-align
text-align-last
text-decoration
text-decoration-color
text-decoration-line
text-decoration-style
text-indent
text-justify
text-overflow
text-shadow
text-transform
top
transform
transform-origin
transform-style
transition
transition-delay
transition-duration
transition-property
transition-timing-function
unicode-bidi
user-select
vertical-align
visibility
white-space
widows
width
word-break
word-spacing
word-wrap
writing-mode
z-index
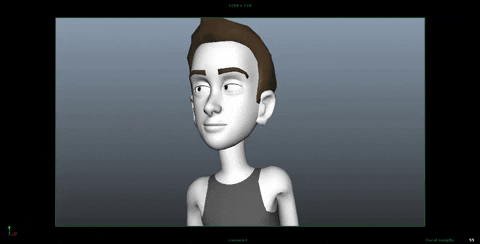
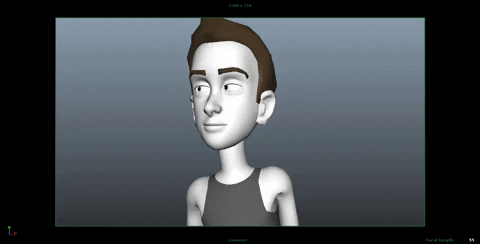
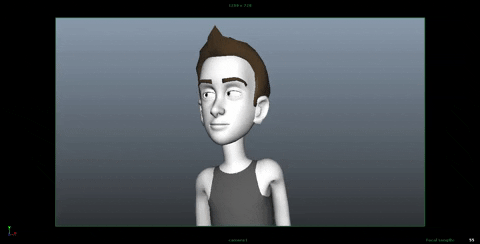
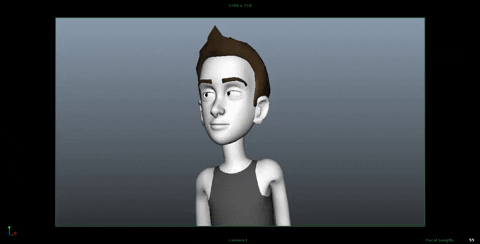
The 6 steps of animation
We’ve talked about the workflow of the animation filmmaking pipeline, now lets go into the actual steps of character animation.
Here are the 6 steps of animation:
- Shooting reference video
- Key posing
- Blocking
- Splining
- Smoothing
- Adding life
Step 1: Shooting Reference video

This is a very important and overlooked step. It’s weird how people really think they know what certain actions look like, and how long they take, but end up getting it wrong.
Physical actions are something you need to analyze before animating, especially if you’re a beginner.
You have a shot of a guy throwing a baseball? Search YouTube for videos of pitchers throwing balls.
Don’t assume you know what an action looks like just because you’ve seen it before.
Looking at an action as an animator is completely different from looking at it as a viewer.
Step 2: Posing
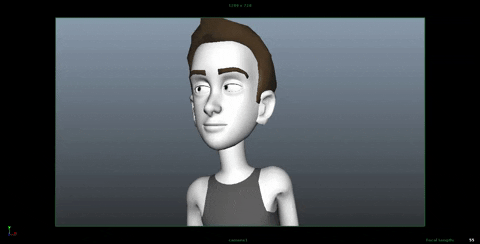
After shooting a reference, it’s time to create the key poses of the shot.
These poses are called key poses because they are the most important poses of the shot. These are the poses that convey the story of the shot. We need to make sure we get those poses right, because we’re going to build on those for the rest of the process.
Step 3: Blocking
Once we’re happy with our key poses, we start breaking down the movement from each pose to the next by adding ‘in betweens’ (also known as breakdown poses or passing poses). These are the poses that connect the key poses.
We keep adding more poses until the movement looks as good as it could, while still staying in stepped mode (stepped mode is when you don’t allow interpolation between poses, which results in a very choppy/blocky motion).
Step 4: Splining
Splining is a 3D animation term. It’s the process in which you convert the interpolation of the keys from stepped to spline.
In other words – you make the computer connect the movement between each of your poses, and that makes the movement look smoother.
The problem is that the computer doesn’t do a very good job at interpolating. It only works with what it has. That’s why the better the blocking is – the better the splined version is going to look.
Step 5: Refining & offset
Now that all of our keys are in spline mode, we need to work on them. We refined the animation curves and make sure the movement looks smooth.
It’s also a good idea to offset some of the actions so it doesn’t look so ‘stop and start’, as if the character is doing all the motion at once.
By the end of this step your shot should look pretty solid and almost finished.
Step 6: Adding life
This step is the a lot of fun.
We’re already finished with the grunt work of animation, and it’s time to add small imperfections that bring life to the character.